Posts

Showing posts from 2010

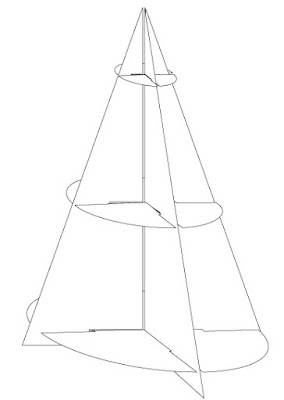
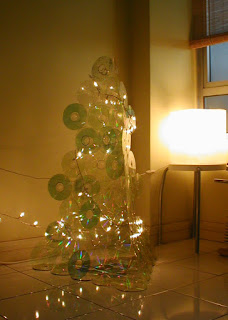
Make Christmas Wreath from old packaging box

Image
We're moving all contents to a new site If you've come here through an old bookmark, please update accordingly. Looking forward to seeing you at the new  URL   😊   😘 I cut the boxes into short 4-5-cm strips and stick them in a random crisscross pattern to make a circle, with cellophane tapes. I've also used some left over old sequins (taken off from an old bag), an old red ribbon, and a "Happy Christmas" wording cut out from an old Christmas card. Easy peasy.

Handmade Christmas Tree from old cardboard

Image
We're moving all contents to a new site If you've come here through an old bookmark, please update accordingly. Looking forward to seeing you at the new  URL   😊   😘 1. Cut the board into 4 equal shapes like this: 2. Mark 3 places where you will put support in for the tree (x, y, z points shown below), measure the width and cut 3 circles with radius the same as x, y, and z respectively. Cut a 2mm thick slot into the boards as shown below: Do not cut the slot too wide from the beginning, only slightly widen it if it is too tight to push 2 boards in together. 3. Hold the triangles upright whilst slotting the circles in sideways, horizontally: 4. Continue with all the other triangles, and you'll have a pine tree structure. The circles can serve as shelves for holding little gifts, or for placing ornaments. And when Christmas is over, just separate all the pieces and pack them flat for next year. I did that and painted it silver (young and foolish and di

CD Christmas Tree

Image
We're moving all contents to a new site If you've come here through an old bookmark, please update accordingly. Looking forward to seeing you at the new  URL   😊   😘 And after a few trials and errors, my transparent, 100% reusable CD Christmas tree is born. This is a 3-tier (each triangular pine tree shape is a tier) size but I can reshape and resize the tree the way I like it next year. I did peel off the shiny coating layer of the CDs before I constructed this, but if you would like to try one yourself, you can also opt to leave the shiny bits on, like what a friend of mine did to her version of CD Christmas tree: Here is the step-by-step guide to making a simple Christmas tree out of old unwanted CDs: Step 1: Arrange CDs into the shape of a tree, secure each adjoining point with cellophane tapes (make sure you tape on both sides). Make 3 sets of this. Step 2: Base on the number of CDs used on the bottom row of step 1, make a triangular base like

Handmade Christmas Cards from Recycled Material

Image
We're moving all contents to a new site If you've come here through an old bookmark, please update accordingly. Looking forward to seeing you at the new  URL   😊   😘 I have just made 8 Christmas cards (one of them already sealed in the envelope) to send to our family and friends - exactly 8 families. They are all made according to whatever I can find in my craft box: old felt I collected from God-knows-where, pretty pictures cut out from old magazines, old greeting cards, old mince pies boxes, tissue wrapping paper saved from packaging, sequins from old bag/shoe trimmings, etc. So you can see that they all look completely different - absolutely no homogenisation! The only NEW stuff I have used - really - are the envelopes. At least these cards will be appreciated more when received, as they contained real effort and love put into the card making process.

Make your own wallet security hook in pocket

Image
We're moving all contents to a new site If you've come here through an old bookmark, please update accordingly. Looking forward to seeing you at the new  URL   😊   😘 2. Folding the strips to half in the middle, I sewed one strip tightly onto the base of each pocket to make a loop: 3. He then tied his wallet to a removable hook with an old ribbon. This way he can hook his wallet to the pocket loop; and if his pocket's ever picked, he'll be able to feel it happening. If you do have one of those hooks that come with a retractable string, it would be quite a good option too.

Too many old receipts and "sold" stickers

Image
We're moving all contents to a new site If you've come here through an old bookmark, please update accordingly. Looking forward to seeing you at the new  URL   😊   😘 All of my friends have laughed at my outrageously looking fridge, but you'd be surprised how useful these are, if you want them to be. As for the thermal receipts, I've found a way to utilise them at least once before they make their way to the bin: as food storage labels. I will label anything to go into the fridge or freezer in a jar or tub, on a piece of thermal receipt (half, if it's a short name). By using the used "sold" stickers, I can stick the label onto the containers. This is extremely useful when you have a lot to store, especially things that are not easily recognised when frozen. (Hint: if you have a husband who can't tell beef from chicken, labelling is essential :-P ) If they are not ruined when defrost, these labels can be reused again and again. I just

Twist tie wires, a useful thing

Image
We're moving all contents to a new site If you've come here through an old bookmark, please update accordingly. Looking forward to seeing you at the new  URL   😊   😘 Here is what I did with some of them: An extended hook for this calendar with a hole that's too small to go on the existing hook: The previous tenant left behind quite a few pointless nails - like this one that is too deep into the wall - which I can hardly hang anything on. So the twist tie wire came in handy as an extension: Due to the flexibility of these twist tie wires, they can be twisted into any shape and form to adapt to your needs. They are also quite strong and sturdy so I've used some to tie the new roller blinds to the old blinds holders which are not the right type for the new ones (as I'd rather not to drill new holes into any of the walls if I can help it): Tied the bamboo blinds onto another pair of existing nails on the wall which don't seem to fit the width

Velvety drawstring knapsack made from old dress

Image
We're moving all contents to a new site If you've come here through an old bookmark, please update accordingly. Looking forward to seeing you at the new  URL   😊   😘 The bottom hem is sewn together to make the base The top bit is hemmed up to leave openings for the drawstring Each corner of the bottom is sewn into triangular flap to make a depth on the base Leftover fabric (from the top bit of the dress) made into pockets on the inside of the bag. The rest of the leftover fabric is used to make a pocket on the outside, complete with zipper (a used one from some old clothing) The drawstrings are taken from an old belt which buckle was broken . The loops holding them at the bottom of the bag is made from the shoulders of the dress. A new drawstring knapsack!

What else can you do with old CDs and DVDs?

Image
We're moving all contents to a new site If you've come here through an old bookmark, please update accordingly. Looking forward to seeing you at the new  URL   😊   😘 I often make cuttings from my existing herb plants such as basil and mint to prolong and increase harvesting. I will place the cuttings in old jars (especially those which labels can never be taken off) filled with water till they root and can be put into soil. However some cuttings can be rather short and the leaves may fall below water surface and they will start to rot. So I put each cutting through the hole of the old CD/DVD, then place over the jar. This way the leaves can stay dry whilst the cuttings stay safe in the water. I have done this so many times, my very first basil plant is still alive since 2008.

Turn an old ripped skirt into handbag

Image
We're moving all contents to a new site If you've come here through an old bookmark, please update accordingly. Looking forward to seeing you at the new  URL   😊   😘 Last worn on 3 April 2009, Lee on Solent

Keep privacy and let light in with window frosting sticker

Image
We're moving all contents to a new site If you've come here through an old bookmark, please update accordingly. Looking forward to seeing you at the new  URL   😊   😘 The big 2-panel full window by our bathroom long tub is one of the prettiest features in our flat. The problem is, some evil developers have built 2 much taller condominium blocks right opposite us. This means that the residents on the higher floor of these blocks might (we just won't know) be able to see us in the tub through our big clear glass window. One might argue that they are too far away to see us clearly, but the thought is just scary. We have done some DIY frosting on the lower panels of the window when we first moved it, just so that we have some privacy (just in case) and will still have good sunlight shining through in the morning. But these high rise blocks were not built then. I would hate to fully block the whole window, nor do we have enough window frosting sticker left from t

Recycled gift wrapping

Image
We're moving all contents to a new site If you've come here through an old bookmark, please update accordingly. Looking forward to seeing you at the new  URL   😊   😘 The purple patterned wrapper in the foreground is from a Christmas present I received in 2008. The white tissue wrapper in the background came from a clothing packaging. The dark pink tissue wrapper underneath is from another gift I received some years ago (which will be used for wrapping the other present) . The gift cards are cut out from old birthday cards. The ribbons are taken from an old top I dismantled. Nothing is new here except for what's wrapped inside, which is the most important thing. But I think they still look quite sweet anyway.