Posts

Showing posts with the label crafts

Upcycled Padded iPad Case from an Old Cancer Research Canvas Bag

Image
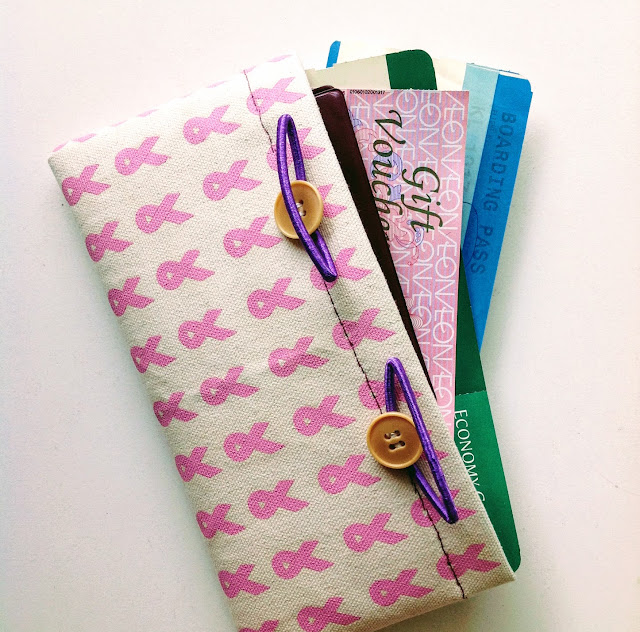
Since making the  Passport Boarding Pass Holder  from the old Cancer Research bag, my sore fingers have had some good rest so it's time to do something with the remaining material. Using the same method as the  Passport Boarding Pass Holder , I made an iPad case: I've used an old worn out vest (the size was just nice) as the lining,  so that the case will have some kind of padding as extra protection for the iPad. Securing the padding (old vest) with rough running stitch on both ends.   After doing proper back stitching on both ends, fold into half and stitch on both sides. Turn inside out. Unused hair rubber bands stitched under buttons to make loops, then stitch 2 buttons on the other side. In our memory, but now serving even better purposes: The Cancer Research canvas bag before the make over
Upcycled Passport Boarding Pass Holder from Old Cancer Research Canvas Bag

Image
I bought a really nice canvas bag from a Cancer Research shop some years ago. Love it but don't use it enough, mainly because it's a little too flat (no gusset) and I'm a girl with many things. I've been trying, but can't seem to make it more useful than just fitting a couple of thin folders in it. So I had 2 choices: force myself to take it out regularly and let it get dirty, OR, don't use it and let it get dusty and mouldy. Such a dilemma. During my recent travel, I was rather annoyed by the fact that I have nothing in the right size that can house both a passport and a boarding pass. They are either too narrow for the passport or the opening is too short for the boarding pass, and I'm quite skeptical about folding it. After some window shopping/market research trips to the shops, all I could find are either very expensive leather goods, or the cheaper PVC version that won't last a year. I decided that I'd put my little fingers to good use an...

Drawstring Bag Knapsack for Exercises, Made from Old Jeans

Image
We're moving all contents to a new site If you've come here through an old bookmark, please update accordingly. Looking forward to seeing you at the new  URL   😊   😘 Body: one leg of old ripped jeans. Straps: unwanted belts that came with two different denim dresses. That's all folks, for I, is off for a walk. 🏃

DIY Tinsel Christmas Tree New Lift

Image
We're moving all contents to a new site If you've come here through an old bookmark, please update accordingly. Looking forward to seeing you at the new  URL   😊   😘 Connect all the tinsels together to make a really long one This time I first wrap up the tripod with some red net fabric we saved from a gift hamper. This way the tinsel holds better in place when twirled around the frame. And the angel lights are placed first so that the wire is not visible over the tree. Start the long tinsel on the top with a knot then twirl it around the tripod until it's all covered up. Tie the end to one of the tripod legs to secure it.

DIY Christmas Wreath Zero Cost

Image
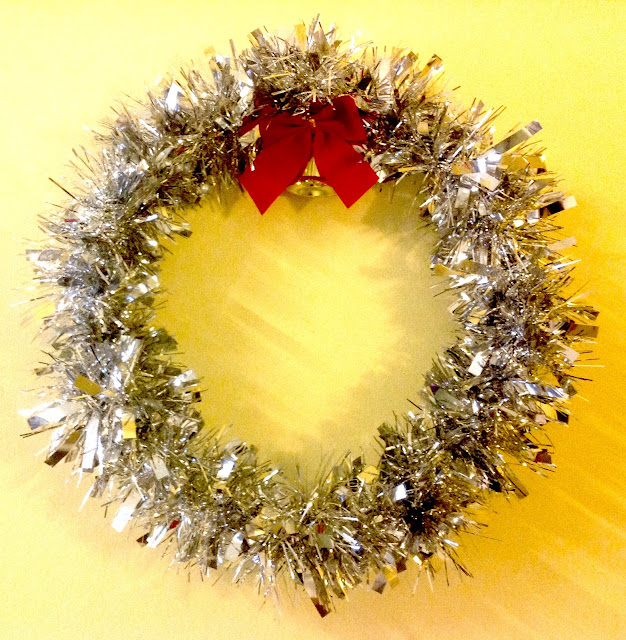
We're moving all contents to a new site If you've come here through an old bookmark, please update accordingly. Looking forward to seeing you at the new  URL   😊   😘 Our old Christmas wreath made from old mince pie boxes has way passed its sell-by date, so it's time to have a new one made. This new one can't be easier; I found an old wire in the tool box (probably taken out from an old hanger) and bent it into a circle, with both ends twisted into small loop then tied with a bendable twist tie wire. I then twirled the silver tinsel (found in the box with old Christmas decoration) around the wire, secured by twisting the ends together. Finally slapped on a decorative bell and ribbon - again, from the Christmas decor box. Not a single penny was spent. Not even an inch of cello tape. Welcome to the first day of Advent!

Upcycled Wine Cork Trivet

Image
We're moving all contents to a new site If you've come here through an old bookmark, please update accordingly. Looking forward to seeing you at the new  URL   😊   😘 Just when I was about to give up and decide to clean them out, I caught a glimpse of a trivet made of wine corks in the background of a TV show. Obviously this is not an original idea and surely there must be others who've already done so, but hey I managed to use up all the corks and turned them into something useful - that's good enough for me. Most importantly: I get to keep them, not bin them ;)

DIY Tinsel Christmas Tree

Image
We're moving all contents to a new site If you've come here through an old bookmark, please update accordingly. Looking forward to seeing you at the new  URL   😊   😘 Angel lights are placed inside of the tree for a softer feel The bad news is, our tripod was broken (the top bit - heaven knows when and how that happened). The good news is, I can now use it for something else with no guilt (especially to all the photography enthusiasts out there) - as a base for our 2015 DIY Christmas tree! DIY Christmas tree from a broken tripod and some Christmas tinsel This has got to be the easiest-to-assemble Christmas tree to date. All I did was set the tripod up to the height I want, then tie the strips of Christmas tinsel around it. Everything can be packed away easily and reused for next Christmas. The wired ribbon has been used a few times on the 2012 Christmas tree on the wall , the 2010 CD Christmas tree , and our very first DIY Christmas tree in 2008 ....

DIY Flash Drive Organizer

Image
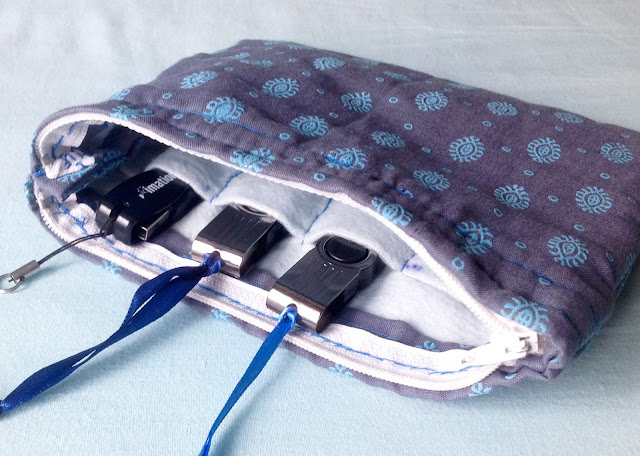
We're moving all contents to a new site If you've come here through an old bookmark, please update accordingly. Looking forward to seeing you at the new  URL   😊   😘 Due to work, I have to keep quite a few flash drives - each for a different type of job or client - in my bag. Although there are small compartments in my bag, I still find myself having to ransack through other stuff in the same pocket to get to the right flash drive. I've looked everywhere for a flash drive organizer but I just can't find one that I like; and most importantly, I do try not to make unnecessary new purchases. So I went to get some inspiration and help from my sewing box, and made this: I found some fabric scrap big enough for my flash drive organizer pattern, an old zip I saved from some old clothes, and an old and partly used Ikea fleece blanket (which I've used some for the snake stuffed toy ). Here are the few simple steps of the making of the flash drive organ...

DIY Ang Pow Packets

Image
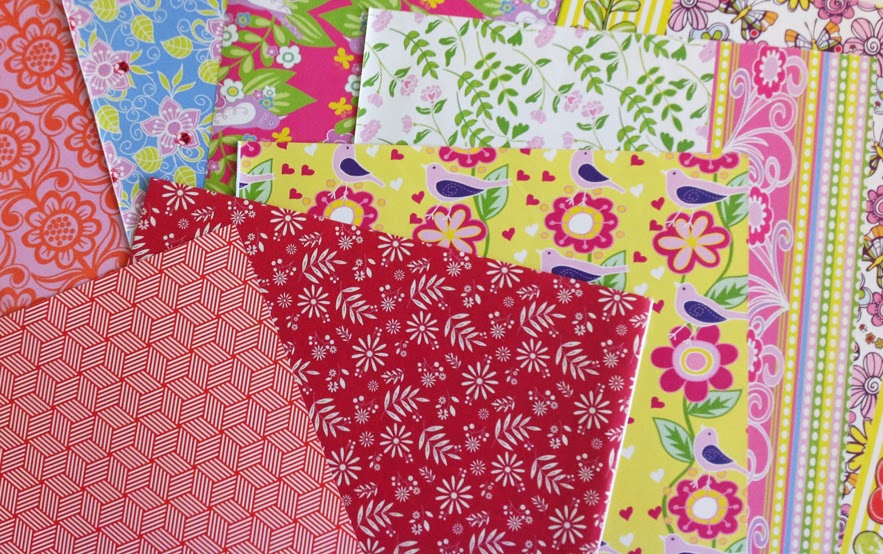
We're moving all contents to a new site If you've come here through an old bookmark, please update accordingly. Looking forward to seeing you at the new  URL   😊   😘 Walking through the Lunar New Year decorations in the shopping mall yesterday, reminded me that we'll need to get hold of some Ang Pow packets (little red envelopes for new year money). We usually get them free with purchase from departmental stores and supermarkets, but you'll often end up with too many or too few of certain designs/sizes. I'm not entirely keen on making unnecessary purchases just for those red packets, let alone advertising for corporations who are already making money out of us. That's when these pretty backing papers springs to mind. I thought their fancy floral patterns and festive colours would definitely make great material for some DIY Ang Pow packets. After a few hours on a quiet Saturday mid morning (with a few TV programmes and cups of tea thrown in), I...

Paper Mache Jack O Lantern Candy Buckets

Image
We're moving all contents to a new site If you've come here through an old bookmark, please update accordingly. Looking forward to seeing you at the new  URL   😊   😘 We're going to have a family dinner right before Halloween so we gotta have something special for the kiddies. I've always wanted to let them have a little trick or treat for fun but I'm really skeptic about buying the ready made ones and make some rich business owners even richer by producing more plastic stuff. So a DIY paper mache Jack o Lantern is an obvious choice. Here are the material used: 2 old unused balloons from last Christmas, blew them up and wrapped each up with a layer of cling film (for easy removal when the glue is dry), and these are the base mould for the pumpkins. Old newspaper and old receipts, torn into tiny strips. Glue made from tapioca flour Leftover white base coat paint Acrylic colours String from an old wrecked drawstring bag First layer for the shap...

DIY Hanging Kitchen Hand Towels

Image
We're moving all contents to a new site If you've come here through an old bookmark, please update accordingly. Looking forward to seeing you at the new  URL   😊   😘

Stuffed Toy Snake from Ikea Fleece Blanket

Image
We're moving all contents to a new site If you've come here through an old bookmark, please update accordingly. Looking forward to seeing you at the new  URL   😊   😘 That was my mink boa for the evening, and good for sofa decoration for the year. Note: The remaining Ikea blanket has been made into a wine bottle bag :)

Gift Wrapping Signage

Image
We're moving all contents to a new site If you've come here through an old bookmark, please update accordingly. Looking forward to seeing you at the new  URL   😊   😘 Then we realised that people aren't really aware of the free service because there isn't any signage apart from one bunting standee. So I offered to make them some signboards. This one here is for the booth top. Apart from the words being printed from my own home-use black-and-white laser printer, everything is taken from existing material in my craft box: the old textured paper it is printed on, the old backing cardboard, the red and green markers, red and green glitter pens, and the frame that is cut and pasted from last year's Christmas cracker casing. I also made a tent card for the counter top with the same material, plus a cut-out gift picture taken from the cover of an old Christmas card. Our dear friend Simon's kind greetings now help warming the hearts of many other...

Eco Egg Crates Christams Tree

Image
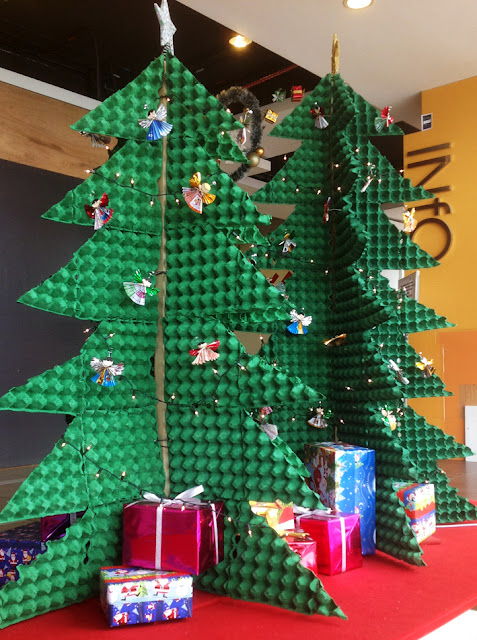
We're moving all contents to a new site If you've come here through an old bookmark, please update accordingly. Looking forward to seeing you at the new  URL   😊   😘 Open in new tab or window to view larger image. Angel with smiley face drawn on cut out cardboard It is small - under 6', and made out of used egg crates held up by rustic wood! Hanging on the tree are little angels with wings made from fan-fold recycled paper (old magazine pages, used wrapping paper, etc) and halos made from twist tie wires (probably from bread packaging), and smiley faces drawn on cut out cardboard! It is not grand like most of the big shopping malls in Kuala Lumpur or Petaling Jaya, but it doesn't look pathetic like many either. And I think that the artists have put great effort in the thinking process and execution to keep consumption to the minimum and still came up with something this lovey. Whoever did this, well done!

Ripped Trousers, Rescued

Image
We're moving all contents to a new site If you've come here through an old bookmark, please update accordingly. Looking forward to seeing you at the new  URL   😊   😘 Here's one of those tasks that I get given by my husband from time to time: fix it! He loves these trousers so much that he wears them again as soon as they get cleaned. And look what happened? The cloth at the waist band is all ripped. There is such a big hole that can't just be sewn back with threads. Also, the print is a very specific camouflage pattern which means that I can't just take any excess cloth and patch it on. But since the back pockets are mainly for decoration purposes, the rescue is here! I took the left back pocket out stitch by stitch very carefully so that I don't leave yet another hole behind. After a little ironing to get rid of the creases, I now have enough material to patch the waist band back. (It's like how they take a bit of the buttock s...

Refashion Depeche Mode T-shirt

Image
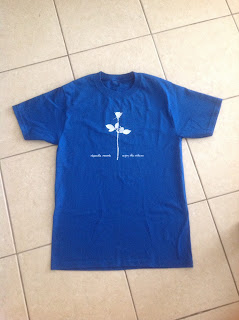
We're moving all contents to a new site If you've come here through an old bookmark, please update accordingly. Looking forward to seeing you at the new  URL   😊   😘 I was given this Depeche Mode T-shirt months ago, but can't bring myself to wearing it as it is still too big although it is an S. Wearing it to bed is completely out of the question because that would have been a blasphemy! I've been wanting to do some alteration so that I can enjoy wearing it and finally found the time to do so last week. And here's what I did: outline the shape of my desired outcome, cut away the unwanted part of the material then hem the sides up (all hand-stitched, no cheating). And this is what I can finally put on and walk out the door, proud :)

Old Dress to New Top

Image
We're moving all contents to a new site If you've come here through an old bookmark, please update accordingly. Looking forward to seeing you at the new  URL   😊   😘 I hate parting with old clothes, especially designs that don't come easy. This long dress has been with me since the late 90s, but lately the stretchiness of the material is gone and it is not tight-fitting any more. I can hear it calling out to me: "Please don't throw me away, please, no!" So here comes the scissors and the needle and threads. I cut the dress across the waist and sewed the hem and made it into a top. Then I dug out a pair of Chinese buttons I savaged from another old top which I had to bin (because the material was falling apart), and voila, I got myself a new Chinese Cheong-sum-like top! As for the bottom part of the dress? I've yet to decide what to do with it, but rest assured, it will be something useful :-)