Posts

Showing posts with the label home decoration

DIY Candles from used wax remains
Image
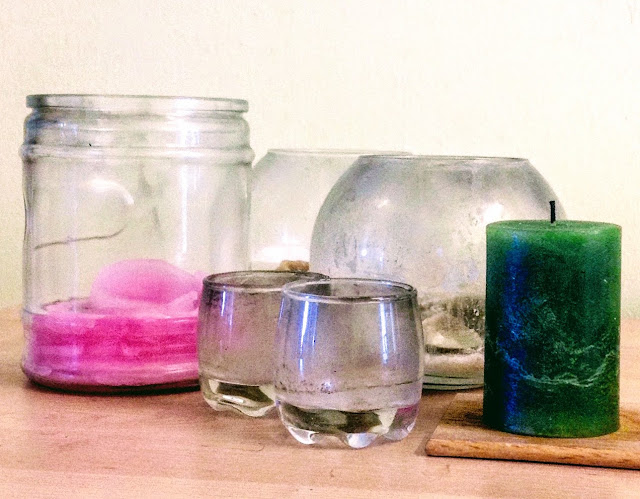
We're moving all contents to a new site If you've come here through an old bookmark, please update accordingly. Looking forward to seeing you at the new  URL   😊   😘 This is what I often get left with, and I'm certainly not going to let them go to waste. So I'm going to have a big melt down - for the wax 😀 It's not a very complicated process, just a little tedious and hot. What I need are: A big pot Some used disposable chopsticks Some parcel string (as I haven't any wicks readily at home) Glass containers/candle holders - to clean up glass candle holders: boiling hot water   First is to melt the old wax (different colours separately) in hot water in the pot, with the string tied to the chopstick placed over the glass container. The string can be fiddly. To make it easier to work with I'll dip it with some melted wax then straighten it whilst the wax dries and hardens up. That way it will stay down to the bo...

DIY Tinsel Christmas Tree New Lift

Image
We're moving all contents to a new site If you've come here through an old bookmark, please update accordingly. Looking forward to seeing you at the new  URL   😊   😘 Connect all the tinsels together to make a really long one This time I first wrap up the tripod with some red net fabric we saved from a gift hamper. This way the tinsel holds better in place when twirled around the frame. And the angel lights are placed first so that the wire is not visible over the tree. Start the long tinsel on the top with a knot then twirl it around the tripod until it's all covered up. Tie the end to one of the tripod legs to secure it.

DIY Christmas Wreath Zero Cost

Image
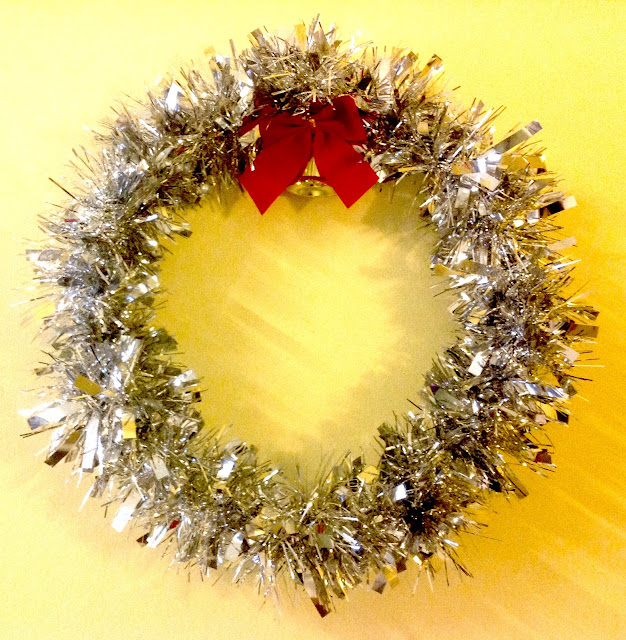
We're moving all contents to a new site If you've come here through an old bookmark, please update accordingly. Looking forward to seeing you at the new  URL   😊   😘 Our old Christmas wreath made from old mince pie boxes has way passed its sell-by date, so it's time to have a new one made. This new one can't be easier; I found an old wire in the tool box (probably taken out from an old hanger) and bent it into a circle, with both ends twisted into small loop then tied with a bendable twist tie wire. I then twirled the silver tinsel (found in the box with old Christmas decoration) around the wire, secured by twisting the ends together. Finally slapped on a decorative bell and ribbon - again, from the Christmas decor box. Not a single penny was spent. Not even an inch of cello tape. Welcome to the first day of Advent!

Upcycled Wine Cork Trivet

Image
We're moving all contents to a new site If you've come here through an old bookmark, please update accordingly. Looking forward to seeing you at the new  URL   😊   😘 Just when I was about to give up and decide to clean them out, I caught a glimpse of a trivet made of wine corks in the background of a TV show. Obviously this is not an original idea and surely there must be others who've already done so, but hey I managed to use up all the corks and turned them into something useful - that's good enough for me. Most importantly: I get to keep them, not bin them ;)

DIY Tinsel Christmas Tree

Image
We're moving all contents to a new site If you've come here through an old bookmark, please update accordingly. Looking forward to seeing you at the new  URL   😊   😘 Angel lights are placed inside of the tree for a softer feel The bad news is, our tripod was broken (the top bit - heaven knows when and how that happened). The good news is, I can now use it for something else with no guilt (especially to all the photography enthusiasts out there) - as a base for our 2015 DIY Christmas tree! DIY Christmas tree from a broken tripod and some Christmas tinsel This has got to be the easiest-to-assemble Christmas tree to date. All I did was set the tripod up to the height I want, then tie the strips of Christmas tinsel around it. Everything can be packed away easily and reused for next Christmas. The wired ribbon has been used a few times on the 2012 Christmas tree on the wall , the 2010 CD Christmas tree , and our very first DIY Christmas tree in 2008 ....

Paper Mache Jack O Lantern Candy Buckets

Image
We're moving all contents to a new site If you've come here through an old bookmark, please update accordingly. Looking forward to seeing you at the new  URL   😊   😘 We're going to have a family dinner right before Halloween so we gotta have something special for the kiddies. I've always wanted to let them have a little trick or treat for fun but I'm really skeptic about buying the ready made ones and make some rich business owners even richer by producing more plastic stuff. So a DIY paper mache Jack o Lantern is an obvious choice. Here are the material used: 2 old unused balloons from last Christmas, blew them up and wrapped each up with a layer of cling film (for easy removal when the glue is dry), and these are the base mould for the pumpkins. Old newspaper and old receipts, torn into tiny strips. Glue made from tapioca flour Leftover white base coat paint Acrylic colours String from an old wrecked drawstring bag First layer for the shap...

Angel Lights and Paper Lanterns

Image
We're moving all contents to a new site If you've come here through an old bookmark, please update accordingly. Looking forward to seeing you at the new  URL   😊   😘 If the power sockets were designed in a more intelligent way, i.e. higher up on the wall and not all the way down close to the floor, we could have hung the lanterns horizontally, across the window. But since the angel lights cable isn't long enough and this is the furthest it can reach so it will have to do for now, until I get another light bulb above my head :) This is what's happening inside the lanterns: Every 7 or 8 bulbs are tied into a cluster using used twist tie wires (I saved them from all sorts: loaf of bread, electrical products, etc). Each cluster of little bulbs will create a brighter light to be fit inside each lantern (imagine in the old days people used to trap a group of fireflies in a jar to provide light in the dark).

Mid Autumn Lanterns Centre Piece

Image
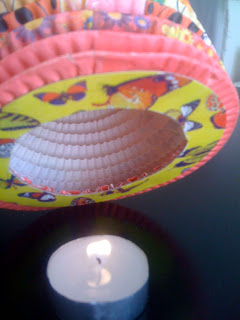
We're moving all contents to a new site If you've come here through an old bookmark, please update accordingly. Looking forward to seeing you at the new  URL   😊   😘 and serve as a beautiful centre piece on the coffee table: Now they are quite safe to handle, and could probably last much longer (and I can reuse them next year!).

Stuffed Toy Snake from Ikea Fleece Blanket

Image
We're moving all contents to a new site If you've come here through an old bookmark, please update accordingly. Looking forward to seeing you at the new  URL   😊   😘 That was my mink boa for the evening, and good for sofa decoration for the year. Note: The remaining Ikea blanket has been made into a wine bottle bag :)

Express Ribbon Christmas Tree On The Wall

Image
We're moving all contents to a new site If you've come here through an old bookmark, please update accordingly. Looking forward to seeing you at the new  URL   😊   😘 It would also fit really well in one of those tiny living spaces suggested in Ikea catalogues ;) 3M hooks arranged to map out typical Christmas tree shape. Wrap ribbon on the hooks to form the shape of the tree. Ribbon secured on 3M wire hooks

Mini Cardboard Tabletop Christmas Tree

Image
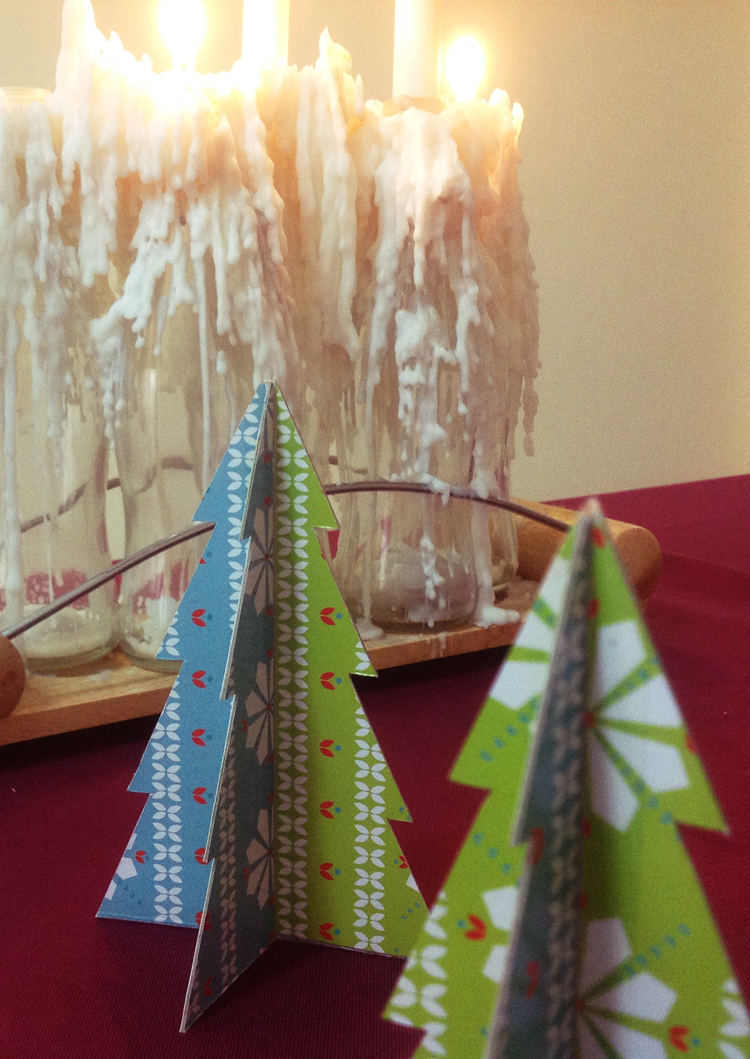
We're moving all contents to a new site If you've come here through an old bookmark, please update accordingly. Looking forward to seeing you at the new  URL   😊   😘    The making is pretty simple: View larger image in new tab or window 1. Material: some patterned or printed cardboard (old Christmas cards, Christmas merchandise packaging, etc), I cut these from last year's Christmas crackers packaging box. 2. Cut them into equal sizes: 2 per tree. 3. Take 2 and stick them together, back to back using double sided tape. 4. Make sure they are adhered nicely together, trim away any jutting out edges. 5. Cut each piece into 2 equal pieces. 6&7. Using a pencil, trace the outline of a simple pine tree onto each piece with a cut out shape prepared ahead (it can also be just a simple triangle). 8. Place 2 half-tree shapes together and secure with cellotape along the middle joining. Repeat with another 2. Fold each joined pair (c...

Christmas Tree from old Christmas Crackers

Image
We're moving all contents to a new site If you've come here through an old bookmark, please update accordingly. Looking forward to seeing you at the new  URL   😊   😘 It's that time of the year again - you're right - time to get busy preparing for Christmas! And what can be more fun than getting the tree up? As usual, the rules here is to have nothing (or very little) bought. Everything must be old, used, or recycled. We had a great success last year with our CD Christmas tree , and the CDs were then stored away for their future use in God-knows-what; maybe rebuild the same tree, who knows? But this year we're going to be away for the holiday so we'll just have something really simple and doesn't require much work. As I was going through my craft boxes, I found this stack of beautiful glossy cardboard that used to be the body of some Christmas crackers we used last year (yes I actually saved those bits). Was initially thinking of making som...

Christmas Stockings from Old Oven Gloves

Image
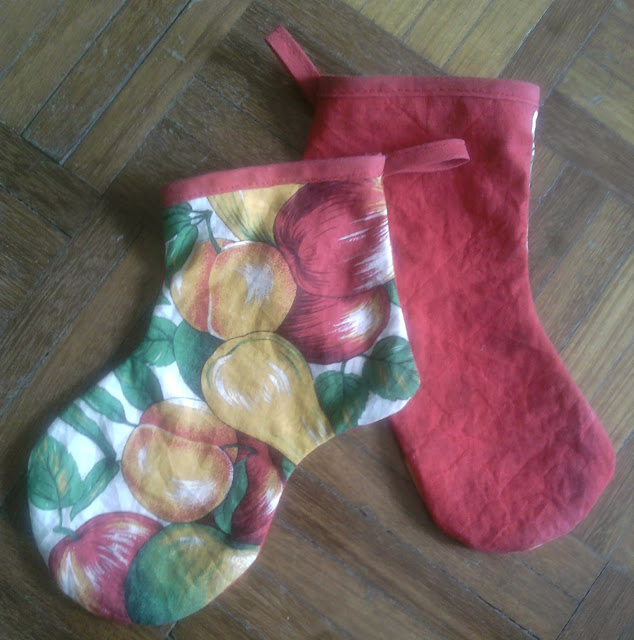
We're moving all contents to a new site If you've come here through an old bookmark, please update accordingly. Looking forward to seeing you at the new  URL   😊   😘 Here are the oven gloves-turned-Christmas stockings: Here is what they looked like before: Being taken apart for cutting: Nothing's wasted!

DIY WIne Glass Charms

Image
We're moving all contents to a new site If you've come here through an old bookmark, please update accordingly. Looking forward to seeing you at the new  URL   😊   😘 We like throwing small dinner parties and enjoy some home cooked food and nice wines - with proper crockery and cutlery - NO disposable ones! But having to keep washing up and drying wine glasses is a pain, especially when everyone seems to get their wine glasses mixed up and decided to get a fresh one. If only we can have something to individualise each wine glass, but obviously not buy putting a horrible looking sticker label over the glass. When I first saw this brilliant product at a department store, I knew that's what I need to add to our wine accessories - some wine glass charms! But they aren't cheap; in fact, they are really expensive! Minimum RM50 for a box of 6 or 8 charms, and that's all you can get: just the 6 or 8 different designs. That's when I decided to make our o...

Twist tie wires, a useful thing

Image
We're moving all contents to a new site If you've come here through an old bookmark, please update accordingly. Looking forward to seeing you at the new  URL   😊   😘 Here is what I did with some of them: An extended hook for this calendar with a hole that's too small to go on the existing hook: The previous tenant left behind quite a few pointless nails - like this one that is too deep into the wall - which I can hardly hang anything on. So the twist tie wire came in handy as an extension: Due to the flexibility of these twist tie wires, they can be twisted into any shape and form to adapt to your needs. They are also quite strong and sturdy so I've used some to tie the new roller blinds to the old blinds holders which are not the right type for the new ones (as I'd rather not to drill new holes into any of the walls if I can help it): Tied the bamboo blinds onto another pair of existing nails on the wall which don't seem to fit the width...

Keep privacy and let light in with window frosting sticker

Image
We're moving all contents to a new site If you've come here through an old bookmark, please update accordingly. Looking forward to seeing you at the new  URL   😊   😘 The big 2-panel full window by our bathroom long tub is one of the prettiest features in our flat. The problem is, some evil developers have built 2 much taller condominium blocks right opposite us. This means that the residents on the higher floor of these blocks might (we just won't know) be able to see us in the tub through our big clear glass window. One might argue that they are too far away to see us clearly, but the thought is just scary. We have done some DIY frosting on the lower panels of the window when we first moved it, just so that we have some privacy (just in case) and will still have good sunlight shining through in the morning. But these high rise blocks were not built then. I would hate to fully block the whole window, nor do we have enough window frosting sticker left from...