Posts

Showing posts with the label packaging box

DIY Tinsel Christmas Tree New Lift

Image
We're moving all contents to a new site If you've come here through an old bookmark, please update accordingly. Looking forward to seeing you at the new  URL   😊   😘 Connect all the tinsels together to make a really long one This time I first wrap up the tripod with some red net fabric we saved from a gift hamper. This way the tinsel holds better in place when twirled around the frame. And the angel lights are placed first so that the wire is not visible over the tree. Start the long tinsel on the top with a knot then twirl it around the tripod until it's all covered up. Tie the end to one of the tripod legs to secure it.

DIY Tinsel Christmas Tree

Image
We're moving all contents to a new site If you've come here through an old bookmark, please update accordingly. Looking forward to seeing you at the new  URL   😊   😘 Angel lights are placed inside of the tree for a softer feel The bad news is, our tripod was broken (the top bit - heaven knows when and how that happened). The good news is, I can now use it for something else with no guilt (especially to all the photography enthusiasts out there) - as a base for our 2015 DIY Christmas tree! DIY Christmas tree from a broken tripod and some Christmas tinsel This has got to be the easiest-to-assemble Christmas tree to date. All I did was set the tripod up to the height I want, then tie the strips of Christmas tinsel around it. Everything can be packed away easily and reused for next Christmas. The wired ribbon has been used a few times on the 2012 Christmas tree on the wall , the 2010 CD Christmas tree , and our very first DIY Christmas tree in 2008 ....

Mini Cardboard Tabletop Christmas Tree

Image
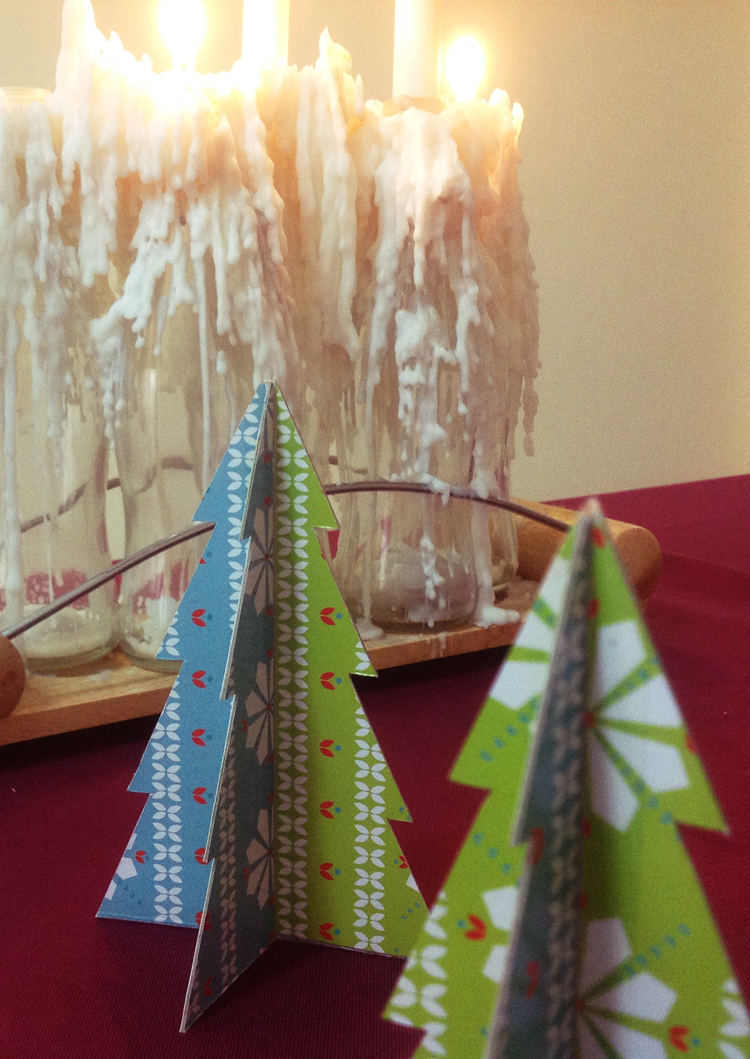
We're moving all contents to a new site If you've come here through an old bookmark, please update accordingly. Looking forward to seeing you at the new  URL   😊   😘    The making is pretty simple: View larger image in new tab or window 1. Material: some patterned or printed cardboard (old Christmas cards, Christmas merchandise packaging, etc), I cut these from last year's Christmas crackers packaging box. 2. Cut them into equal sizes: 2 per tree. 3. Take 2 and stick them together, back to back using double sided tape. 4. Make sure they are adhered nicely together, trim away any jutting out edges. 5. Cut each piece into 2 equal pieces. 6&7. Using a pencil, trace the outline of a simple pine tree onto each piece with a cut out shape prepared ahead (it can also be just a simple triangle). 8. Place 2 half-tree shapes together and secure with cellotape along the middle joining. Repeat with another 2. Fold each joined pair (c...

Gift Wrapping Signage

Image
We're moving all contents to a new site If you've come here through an old bookmark, please update accordingly. Looking forward to seeing you at the new  URL   😊   😘 Then we realised that people aren't really aware of the free service because there isn't any signage apart from one bunting standee. So I offered to make them some signboards. This one here is for the booth top. Apart from the words being printed from my own home-use black-and-white laser printer, everything is taken from existing material in my craft box: the old textured paper it is printed on, the old backing cardboard, the red and green markers, red and green glitter pens, and the frame that is cut and pasted from last year's Christmas cracker casing. I also made a tent card for the counter top with the same material, plus a cut-out gift picture taken from the cover of an old Christmas card. Our dear friend Simon's kind greetings now help warming the hearts of many other...

Christmas Tree from old Christmas Crackers

Image
We're moving all contents to a new site If you've come here through an old bookmark, please update accordingly. Looking forward to seeing you at the new  URL   😊   😘 It's that time of the year again - you're right - time to get busy preparing for Christmas! And what can be more fun than getting the tree up? As usual, the rules here is to have nothing (or very little) bought. Everything must be old, used, or recycled. We had a great success last year with our CD Christmas tree , and the CDs were then stored away for their future use in God-knows-what; maybe rebuild the same tree, who knows? But this year we're going to be away for the holiday so we'll just have something really simple and doesn't require much work. As I was going through my craft boxes, I found this stack of beautiful glossy cardboard that used to be the body of some Christmas crackers we used last year (yes I actually saved those bits). Was initially thinking of making som...

Make Christmas Wreath from old packaging box

Image
We're moving all contents to a new site If you've come here through an old bookmark, please update accordingly. Looking forward to seeing you at the new  URL   😊   😘 I cut the boxes into short 4-5-cm strips and stick them in a random crisscross pattern to make a circle, with cellophane tapes. I've also used some left over old sequins (taken off from an old bag), an old red ribbon, and a "Happy Christmas" wording cut out from an old Christmas card. Easy peasy.

Handmade Christmas Tree from old cardboard

Image
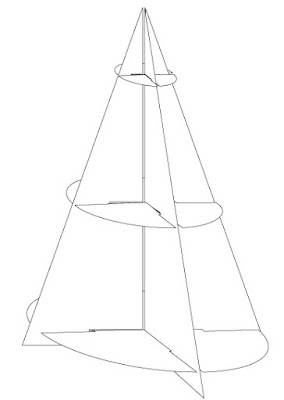
We're moving all contents to a new site If you've come here through an old bookmark, please update accordingly. Looking forward to seeing you at the new  URL   😊   😘 1. Cut the board into 4 equal shapes like this: 2. Mark 3 places where you will put support in for the tree (x, y, z points shown below), measure the width and cut 3 circles with radius the same as x, y, and z respectively. Cut a 2mm thick slot into the boards as shown below: Do not cut the slot too wide from the beginning, only slightly widen it if it is too tight to push 2 boards in together. 3. Hold the triangles upright whilst slotting the circles in sideways, horizontally: 4. Continue with all the other triangles, and you'll have a pine tree structure. The circles can serve as shelves for holding little gifts, or for placing ornaments. And when Christmas is over, just separate all the pieces and pack them flat for next year. I did that and painted it silver (young and foolish and ...

Handmade Christmas Cards from Recycled Material

Image
We're moving all contents to a new site If you've come here through an old bookmark, please update accordingly. Looking forward to seeing you at the new  URL   😊   😘 I have just made 8 Christmas cards (one of them already sealed in the envelope) to send to our family and friends - exactly 8 families. They are all made according to whatever I can find in my craft box: old felt I collected from God-knows-where, pretty pictures cut out from old magazines, old greeting cards, old mince pies boxes, tissue wrapping paper saved from packaging, sequins from old bag/shoe trimmings, etc. So you can see that they all look completely different - absolutely no homogenisation! The only NEW stuff I have used - really - are the envelopes. At least these cards will be appreciated more when received, as they contained real effort and love put into the card making process.

Eco Friendly Handmade foldable 2-D Christmas tree

Image
We're moving all contents to a new site You can find us here at the new  storage compartments from excessive packaging URL   If you've come here through an old bookmark, please update accordingly 😊 😘 Last year we made a Christmas tree out of used A4 and A3 paper with tapioca starch glue, but unfortunately we don't have the space to store it away as it can't be folded down flat except the legs. So we had to dismantle the tree and send the paper for recycling. However, the cardboard baubles, the foil star and the tree legs are saved. So this year I thought we'd better have something that can be folded flat and stored away when the season is over, so that we can probably reuse it next year.

Creating storage compartments from excessive packaging

Image
We're moving all contents to a new site You can find us here at the new  storage compartments from excessive packaging URL   If you've come here through an old bookmark, please update accordingly 😊 😘 Due to my nature of a hoarder, I have over the years, collected a number of these plastic tubs. I knew [ahem] they would come in handy one day. So when I needed to sort my beads in various colours and types, I found these sauce tubs really useful. I can see the size and colour of the beads, and I can stack them neatly in my craft drawers. When I ran out of the tubs, I simply cut some of my old packaging boxes (from supplements, cream, etc) to make small boxes. I then tape the top off with masking tape to secure the beads. Since these are not transparent, I took one of the beads to stick it outside the box to mark the type of beads in each box. I did this when I had to move away and had no choice but to store the beads away for a long time. Now that I can fi...