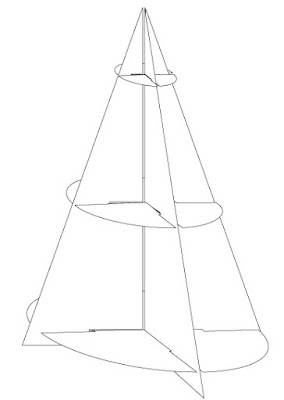
Handmade Christmas Tree from old cardboard
We're moving all contents to a new site
If you've come here through an old bookmark, please update accordingly.
Looking forward to seeing you at the new URL 😊 😘
1. Cut the board into 4 equal shapes like this:

2. Mark 3 places where you will put support in for the tree (x, y, z points shown below), measure the width and cut 3 circles with radius the same as x, y, and z respectively. Cut a 2mm thick slot into the boards as shown below:

Do not cut the slot too wide from the beginning, only slightly widen it if it is too tight to push 2 boards in together.
3. Hold the triangles upright whilst slotting the circles in sideways, horizontally:

4. Continue with all the other triangles, and you'll have a pine tree structure. The circles can serve as shelves for holding little gifts, or for placing ornaments. And when Christmas is over, just separate all the pieces and pack them flat for next year. I did that and painted it silver (young and foolish and didn't know much about the harm spray paint can do back then) the next year because it was pretty dusty and mouldy being in the tropics.
It was a very therapeutic little project for me then - made myself very happy and gave all my friends a nice surprise when they came back for the new term.
Note: you can make a tree of any size depending on the cardboard size you have. And you can also carve out the shape of a typical pine tree by cutting some ridges on the sides.


Comments
Post a Comment