Posts

Showing posts with the label christmas

DIY Tinsel Christmas Tree New Lift

Image
We're moving all contents to a new site If you've come here through an old bookmark, please update accordingly. Looking forward to seeing you at the new  URL   😊   😘 Connect all the tinsels together to make a really long one This time I first wrap up the tripod with some red net fabric we saved from a gift hamper. This way the tinsel holds better in place when twirled around the frame. And the angel lights are placed first so that the wire is not visible over the tree. Start the long tinsel on the top with a knot then twirl it around the tripod until it's all covered up. Tie the end to one of the tripod legs to secure it.
DIY Christmas Wreath Zero Cost

Image
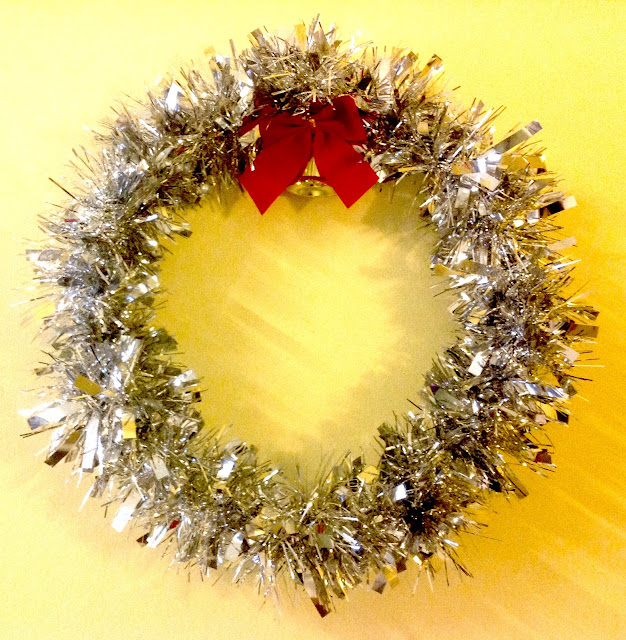
We're moving all contents to a new site If you've come here through an old bookmark, please update accordingly. Looking forward to seeing you at the new  URL   😊   😘 Our old Christmas wreath made from old mince pie boxes has way passed its sell-by date, so it's time to have a new one made. This new one can't be easier; I found an old wire in the tool box (probably taken out from an old hanger) and bent it into a circle, with both ends twisted into small loop then tied with a bendable twist tie wire. I then twirled the silver tinsel (found in the box with old Christmas decoration) around the wire, secured by twisting the ends together. Finally slapped on a decorative bell and ribbon - again, from the Christmas decor box. Not a single penny was spent. Not even an inch of cello tape. Welcome to the first day of Advent!

DIY Tinsel Christmas Tree

Image
We're moving all contents to a new site If you've come here through an old bookmark, please update accordingly. Looking forward to seeing you at the new  URL   😊   😘 Angel lights are placed inside of the tree for a softer feel The bad news is, our tripod was broken (the top bit - heaven knows when and how that happened). The good news is, I can now use it for something else with no guilt (especially to all the photography enthusiasts out there) - as a base for our 2015 DIY Christmas tree! DIY Christmas tree from a broken tripod and some Christmas tinsel This has got to be the easiest-to-assemble Christmas tree to date. All I did was set the tripod up to the height I want, then tie the strips of Christmas tinsel around it. Everything can be packed away easily and reused for next Christmas. The wired ribbon has been used a few times on the 2012 Christmas tree on the wall , the 2010 CD Christmas tree , and our very first DIY Christmas tree in 2008 ....

Express Ribbon Christmas Tree On The Wall

Image
We're moving all contents to a new site If you've come here through an old bookmark, please update accordingly. Looking forward to seeing you at the new  URL   😊   😘 It would also fit really well in one of those tiny living spaces suggested in Ikea catalogues ;) 3M hooks arranged to map out typical Christmas tree shape. Wrap ribbon on the hooks to form the shape of the tree. Ribbon secured on 3M wire hooks

Mini Cardboard Tabletop Christmas Tree

Image
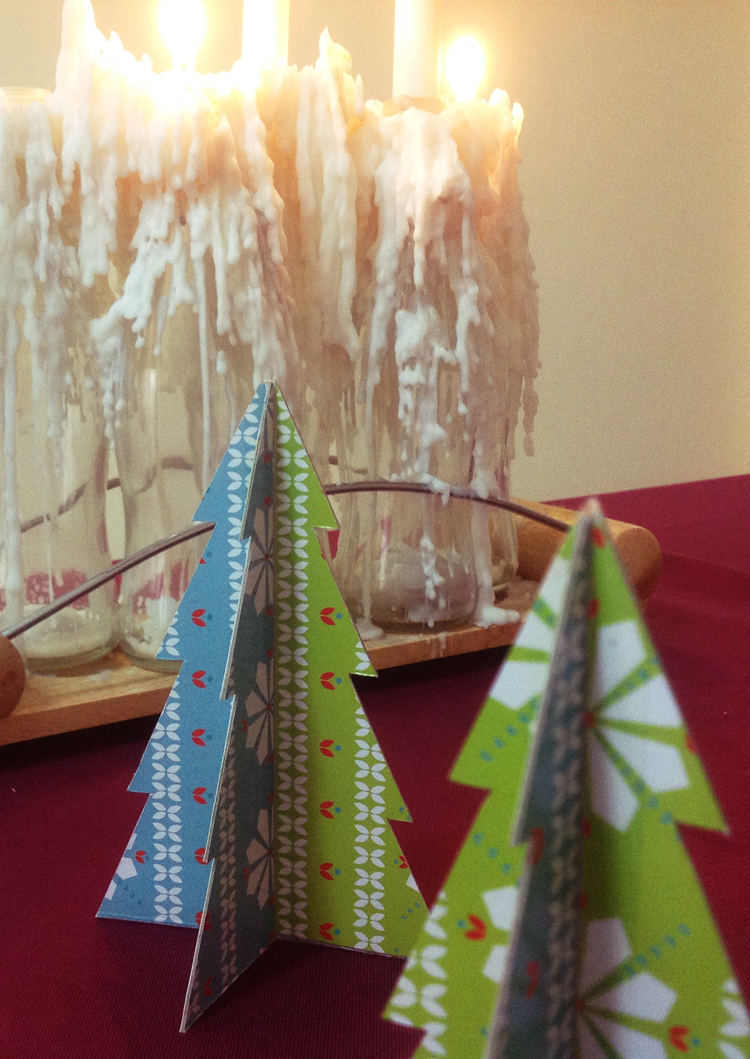
We're moving all contents to a new site If you've come here through an old bookmark, please update accordingly. Looking forward to seeing you at the new  URL   😊   😘    The making is pretty simple: View larger image in new tab or window 1. Material: some patterned or printed cardboard (old Christmas cards, Christmas merchandise packaging, etc), I cut these from last year's Christmas crackers packaging box. 2. Cut them into equal sizes: 2 per tree. 3. Take 2 and stick them together, back to back using double sided tape. 4. Make sure they are adhered nicely together, trim away any jutting out edges. 5. Cut each piece into 2 equal pieces. 6&7. Using a pencil, trace the outline of a simple pine tree onto each piece with a cut out shape prepared ahead (it can also be just a simple triangle). 8. Place 2 half-tree shapes together and secure with cellotape along the middle joining. Repeat with another 2. Fold each joined pair (c...

Gift Wrapping Signage

Image
We're moving all contents to a new site If you've come here through an old bookmark, please update accordingly. Looking forward to seeing you at the new  URL   😊   😘 Then we realised that people aren't really aware of the free service because there isn't any signage apart from one bunting standee. So I offered to make them some signboards. This one here is for the booth top. Apart from the words being printed from my own home-use black-and-white laser printer, everything is taken from existing material in my craft box: the old textured paper it is printed on, the old backing cardboard, the red and green markers, red and green glitter pens, and the frame that is cut and pasted from last year's Christmas cracker casing. I also made a tent card for the counter top with the same material, plus a cut-out gift picture taken from the cover of an old Christmas card. Our dear friend Simon's kind greetings now help warming the hearts of many other...

Eco Egg Crates Christams Tree

Image
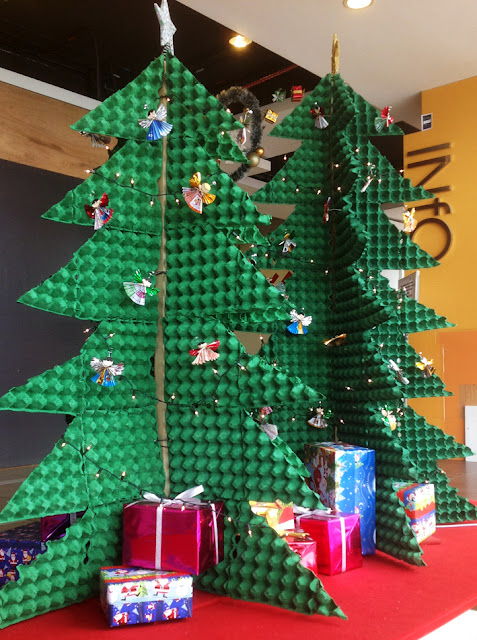
We're moving all contents to a new site If you've come here through an old bookmark, please update accordingly. Looking forward to seeing you at the new  URL   😊   😘 Open in new tab or window to view larger image. Angel with smiley face drawn on cut out cardboard It is small - under 6', and made out of used egg crates held up by rustic wood! Hanging on the tree are little angels with wings made from fan-fold recycled paper (old magazine pages, used wrapping paper, etc) and halos made from twist tie wires (probably from bread packaging), and smiley faces drawn on cut out cardboard! It is not grand like most of the big shopping malls in Kuala Lumpur or Petaling Jaya, but it doesn't look pathetic like many either. And I think that the artists have put great effort in the thinking process and execution to keep consumption to the minimum and still came up with something this lovey. Whoever did this, well done!

Christmas Tree from old Christmas Crackers

Image
We're moving all contents to a new site If you've come here through an old bookmark, please update accordingly. Looking forward to seeing you at the new  URL   😊   😘 It's that time of the year again - you're right - time to get busy preparing for Christmas! And what can be more fun than getting the tree up? As usual, the rules here is to have nothing (or very little) bought. Everything must be old, used, or recycled. We had a great success last year with our CD Christmas tree , and the CDs were then stored away for their future use in God-knows-what; maybe rebuild the same tree, who knows? But this year we're going to be away for the holiday so we'll just have something really simple and doesn't require much work. As I was going through my craft boxes, I found this stack of beautiful glossy cardboard that used to be the body of some Christmas crackers we used last year (yes I actually saved those bits). Was initially thinking of making som...

Christmas Stockings from Old Oven Gloves

Image
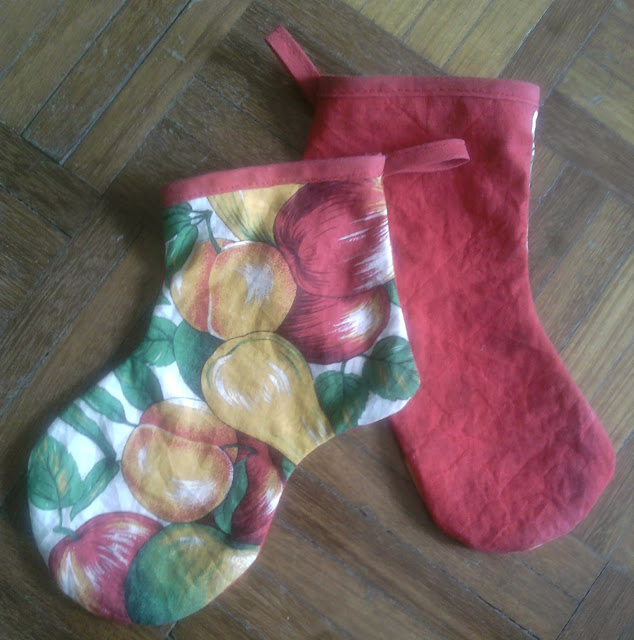
We're moving all contents to a new site If you've come here through an old bookmark, please update accordingly. Looking forward to seeing you at the new  URL   😊   😘 Here are the oven gloves-turned-Christmas stockings: Here is what they looked like before: Being taken apart for cutting: Nothing's wasted!

Make Christmas Wreath from old packaging box

Image
We're moving all contents to a new site If you've come here through an old bookmark, please update accordingly. Looking forward to seeing you at the new  URL   😊   😘 I cut the boxes into short 4-5-cm strips and stick them in a random crisscross pattern to make a circle, with cellophane tapes. I've also used some left over old sequins (taken off from an old bag), an old red ribbon, and a "Happy Christmas" wording cut out from an old Christmas card. Easy peasy.

Handmade Christmas Tree from old cardboard

Image
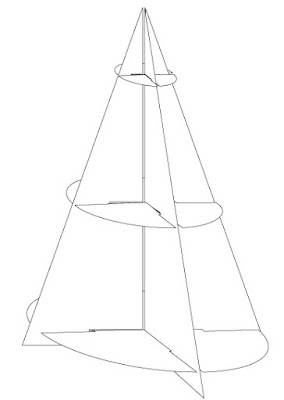
We're moving all contents to a new site If you've come here through an old bookmark, please update accordingly. Looking forward to seeing you at the new  URL   😊   😘 1. Cut the board into 4 equal shapes like this: 2. Mark 3 places where you will put support in for the tree (x, y, z points shown below), measure the width and cut 3 circles with radius the same as x, y, and z respectively. Cut a 2mm thick slot into the boards as shown below: Do not cut the slot too wide from the beginning, only slightly widen it if it is too tight to push 2 boards in together. 3. Hold the triangles upright whilst slotting the circles in sideways, horizontally: 4. Continue with all the other triangles, and you'll have a pine tree structure. The circles can serve as shelves for holding little gifts, or for placing ornaments. And when Christmas is over, just separate all the pieces and pack them flat for next year. I did that and painted it silver (young and foolish and ...

CD Christmas Tree

Image
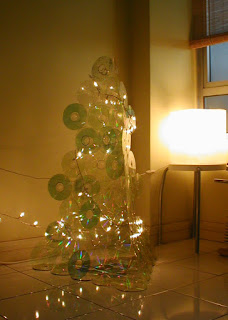
We're moving all contents to a new site If you've come here through an old bookmark, please update accordingly. Looking forward to seeing you at the new  URL   😊   😘 And after a few trials and errors, my transparent, 100% reusable CD Christmas tree is born. This is a 3-tier (each triangular pine tree shape is a tier) size but I can reshape and resize the tree the way I like it next year. I did peel off the shiny coating layer of the CDs before I constructed this, but if you would like to try one yourself, you can also opt to leave the shiny bits on, like what a friend of mine did to her version of CD Christmas tree: Here is the step-by-step guide to making a simple Christmas tree out of old unwanted CDs: Step 1: Arrange CDs into the shape of a tree, secure each adjoining point with cellophane tapes (make sure you tape on both sides). Make 3 sets of this. Step 2: Base on the number of CDs used on the bottom row of step 1, make a triangular base...

Handmade Christmas Cards from Recycled Material

Image
We're moving all contents to a new site If you've come here through an old bookmark, please update accordingly. Looking forward to seeing you at the new  URL   😊   😘 I have just made 8 Christmas cards (one of them already sealed in the envelope) to send to our family and friends - exactly 8 families. They are all made according to whatever I can find in my craft box: old felt I collected from God-knows-where, pretty pictures cut out from old magazines, old greeting cards, old mince pies boxes, tissue wrapping paper saved from packaging, sequins from old bag/shoe trimmings, etc. So you can see that they all look completely different - absolutely no homogenisation! The only NEW stuff I have used - really - are the envelopes. At least these cards will be appreciated more when received, as they contained real effort and love put into the card making process.

Beaded tiara headband for kids

Image
We're moving all contents to a new site If you've come here through an old bookmark, please update accordingly.  Looking forward to seeing you at the new  Beaded tiara headband URL   😊 😘 I've used only fishing lines as I haven't any steel wire, and buying some just for that is going to defeat the purpose of using up existing material. Fishing lines are soft and flexible so they can't be worn like commercial tiaras. However, they turned out to be dual-purpose: 1. to be worn as a headband, and 2. as a necklace. Perhaps I can make up stories about some fairy princesses whose tiaras can turn into magical necklaces that give them power, and I think the girls would like that.

DIY Christmassy Purple Beaded Napkin Rings

Image
We're moving all contents to a new site You can find us here at the new  DIY Christmassy Purple Beaded Napkin Rings URL   If you've come here through an old bookmark, please update accordingly 😊 😘 Since the last bunch of beaded napkin rings , I've gone a little obsessed with napkin rings and have made another set with different coloured beads and design. I managed to make 5 with the leftover beads from making my choker necklace and a beaded belt. I think they look really good with my mostly white table setting and crockeries. Unlike the turquoise napkin rings , these ones have a slightly more complicated design so it took me almost 2 evenings to complete. Here is the step-by-step process in illustration: 1. I use a 0.35 nylon fishing thread (that's what I have in my drawer), but you can use a thinner one as the napkin rings are only small. I measure it to about 1.1m for each napkin ring. It's always best to use 1 whole thread f...